Recipe Search

Thursday, February 11, 2010

Queen of Hearts

What do you do to show the one you love just how much you love them? I certainly don't wait until Valentines day, one specific day of the year to show the ones I love just that I do. And how do I do that you might ask? Baked goods baby!


This Valentines I was inspired most by two things, the upcoming opening of Tim Burton's Alice in Wonderland and the 2006 Summer issue of Donna Hay Magazine. This issue inspired me to bake when I was studying abroad in Australia in 2006 and still is the most inspirational magazine for the baker in me. Everything from the recipes, the themes and most importantly the food photography. Check it out sometime. Now you ask what these two have in common? Well, I did my best to recreate it and hopefully I did Donna Hay justice. Let the pictures roll.


Caramel Paddies made with puff pastry


Chocolate Heart Cookies with Royal Icing

Blueberry, Pear Heart Pies

Tea Time Brownies dusted with powdered sugar

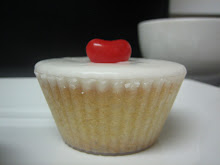
Lovely Citrus Cupcakes with Cointreau Icing


Will you be my Valentine? 
Love, Sarah

Sunday, January 10, 2010

Crazy About Coconut

Happy New Year bakers! 

I like to celebrate the new year with coconut confections. I absolutely love coconut and these are my three favorite coconut recipes.


The Red Velvet Cake I made last holiday looks like a snow scape making it a perfect cake for a holiday dessert, new years party or winter gathering. Check out the recipe here. I keep three cake pans around the house to make towering cake such as this one. The cake doesn't rise much but after baking will be cut in half horizontally to make the layers. You can decorate the cake with coconut or pecans.


The Coconut Macaroon is my specialty. The original recipe I used to make it stems from Martha Stewart's recipe. I make several different variations; lime and coconut; cinnamon sugar, honey, and vanilla with chocolate drizzle. The are so soft in the middle with a caramelized sugar flavor and texture.


Coconut cupcakes...what more can I say. Doesn't the word cupcake alone make you smile? What makes this recipe so special is that the coconut flavor comes from gobs and gobs of cream of coconut. So rich and gooey you will need a big glass of milk. Here I had slightly died the coconut with food coloring for a party theme.

Mini's

Coconut Cupcakes with Cream Cheese Frosting

Wednesday, December 30, 2009

Christmastime is here again!

Every year I plan to make a lot of my holiday gifts from scratch or by hand. Gifts tend to be more from the heart and sentimental when you make them yourself. This year I planned and actually accomplished making cookie boxes for close friends and family and small truffle boxes filled with goodies as stocking stuffers.

The cookie boxes included recipes from my favorite chefs. Chewy Ginger Cookies, Grandma Doyle's Sugar Cookies, my favorite Coconut Macaroons, Chocolate Holiday Cookies and Chocolate Caramels. My favorite part of all this is the presentation, assembling the boxes, wrapping the caramels in festive wrappers and putting the cookies in cupcake liners. It really ties a cookie box together.

Carmels and Macaroon Truffle Boxes


I know at times it may seem overwhelming, trust me, at one point I couldn't stop working. I had glitter all over the floor, double stick tape stick to me while pulling cookie batch after cookie batch out of the oven. My suggestion to you in times when it just doesn't seem possible to make a lovely gift when its a whole lot easier to go buy something...assembly line baby! Making something is way better for your soul, your receivers heart, and all around better for mother nature. Here's how:
  1. Choose a box that fits well with what you want to put in it and how you want to ship/give it.
  2. Pick out festive papers and stickers for labels with a special touch
  3. Embossing makes your crafts pop of the paper. You can find the powder and heat gun at your local craft shop
  4. Pick a paper to line the inside of the box. This can be a tissue paper or parchment. I use wax paper because my Grandma wrapped everything in wax paper
  5. Organize an afternoon of baking. I split the days in half, make all of the dough on day one and bake all the cookies on day two.
  6. Assembly line! Build all your boxes, make and apply your labels, line all your boxes and fill them up.
Here are some photos of what I did this Christmas.

Layer 1


Layer 2


Layer 3


Final Cookie Box

I hope your holidays are full of warm cookies, sweet cakes and family and friends. Happy Holidays from the Mixing Bowl!

Tuesday, December 8, 2009

Thanksgiving Part II: Pies, Tarts and Cupcakes Oh My!

Thanksgiving week was a very busy week for me as I am sure it was for all you bakers. This is just that start of it right?! I have Christmas cookie boxes coming up and several December birthday cakes to make and decorate and stocking stuffer goodies!

Aside from baking I LOVE San Francisco at night during the holidays. Talk about romantic! Colin and I started going a Christmas date every year where we hop on the California Cable Car line and enjoy the sites and later a nice cozy dinner for two.

At the bottom of California Street we hop on the festively decorated cable car and snuggle up close as we go up, up, up those steep San Francisco hills. We enjoy the ride and the holiday view of pretty decorations and trees decked in lights, giant ornaments, stars and over-sized holiday packages. One of my favorites is the towering crimson tree on the corner of Keary and California in the Financial District. This unique tree is brightly lit by dark red tree lights.

The best part of the whole ride, beside having dinner afterward is when we hop off at the Fairmont Hotel. We walk around Huntington Park, also festively decorated and we sit and admire Grace Cathedral. It truly is a site to see any time of year but especially during the holidays. 

Although I (with the help of my sister) made three things for Thanksgiving ; Pumpkin-Pecan Pie, Baci Tart and Spice Cupcakes with Toasted Walnut Cream Cheese Frosting, I would have to say the winning recipe was the Baci Tart. This you can definitely make it for the Holidays coming up and is actually quite easy once you read the recipe from start to finish.


Baci Tart

This Baci Tart is made by putting together great tasting layers. To start it off a decedent chocolate tart crust, very easy and a great support to hold all that ooey gooey rich flavor. Next, a caramel sauce is made and roasted hazelnuts are added to the caramel sauce and its all poured into the pie shell. While all the goodness is baking in the oven I make a quick whipped cream. And when it comes out of the oven I drizzle chocolate ganache over the tart to make it look like a work of art :) Yummy right? 

This recipe can be found in the lovely baking book, The Art and Soul of Baking by Sur La Table with Cindy Mushet or by clicking here. Really give it a try! Its a show stopper! Here are pics from the other treats I made.


Sweet and savory Pumpkin-Pecan Deep Dish Pie

 
Spice Cupcakes with Toasted Walnut Cream Cheese Frosting

Wednesday, November 25, 2009

Thanksgiving: Part 1 - Cupcakes

Christmas is here again! Christmas in San Francisco is like no other. It’s a bit early for full on Christmas spirit throughout the city but at Union Square Park the Holiday spirit is coming together; kids crowd around the holiday ice rink, all the store windows are decorated with snow-scapes and Santa villages. Visitors from all over stroll the streets bundled up with a cup of coffee sharing the sidewalks with the early bird shoppers. My favorite holiday tradition of all? The puppies and kittens in the window at Macy's (old Gumps tradition) that’s put on by the SPCA! So so adorable!

My other favorite holiday tradition...baking of course! The only reason why I can relax and enjoy the holidays even when it gets crazy. This year because I am making so many treats I have made a schedule for myself and when you have five or six desserts you are making in one week that’s the only way to go. But really I couldn't do it without my stand mixer! If you do a lot of baking, even if its just for the holiday, invest in one, they will last you a lifetime and save you the sweat and tears of mixing by hand. I will keep you in the loop on the holiday makings - this is Part I starting with Thanksgiving!

The first recipe of the holidays I will share with you comes from my co-worker Elizabeth. This recipe, Chocolate Chip Kahlua Cupcakes with Orange Cream Cheese Frosting is a real crowd pleaser and is semi-homemade. Us young girls are pretty busy these days managing our social and professional lives that some times its difficult to make everything from scratch. As you know I am a firm believer in making it from scratch but this recipe I'd say will knock their socks off even if you are short on time.

This recipe was originally made for a bunt cake pan. It translates well into 2 dozen regular cupcakes and 2 dozen minis and the frosting recipe is provided as well but is totally interchangeable. I chose a pumpkin frosting for Thanksgiving but oddly enough the frosting came out tasting more orange than expected changed the name too. But what a great pair the orange frosting made with the chocolate cupcakes. Who doesn't love those chocolate oranges at Christmas? Happy Thanksgiving and enjoy! Stay tuned for Part II.

Kahlua Chocolate Chip Cupcakes with Orange Cream Cheese Frosting


Minis

Kahlua Cake
Recipe provided by Elizabeth Young

1 pkg. Devil’s food cake mix
1 Large pkg. instant chocolate pudding mix
3 Eggs
1 c. Sour cream
1 c. Kahlua
¾ c. Vegetable oil
12 oz. Chocolate chips (I use Ghirardelli 60% baking chips)

Preheat oven to 350 degrees. Combine everything but the chocolate chips and mix well. Mix the chocolate chips into the batter. P our into a lightly greased pan or muffin tins with cupcake liners. Bake at 350 degrees for 60 minutes (17-20 minutes for regular cupcakes and 10-12 minutes for mini cupcakes). Let cool before removing from pan. Top cooled cake with Pumpkin Cream Cheese Frosting.


Pumpkin Cream Cheese Frosting (that tastes more like orange than pumpkin)
Recipe provided by Country Living at www.countryliving.com

1 package(s) (8-ounce) cream cheese, softened
1/4 cup(s) pumpkin purée
1/4 cup(s) (1/2 stick) unsalted butter, softened
1 tablespoon(s) fresh orange juice
1 teaspoon(s) grated orange zest
1/2 teaspoon(s) pure vanilla extract
4 cup(s) confectioners' sugar, sifted

Blend the cream cheese, pumpkin purée, butter, orange juice, zest, and vanilla in a large bowl using an electric mixer set at medium speed until smooth. Add the sugar and continue to beat until light and creamy -- about 5 more minutes. To keep your frosting super thick first drain most of the liquid from the pumpkin then add the pumpkin a little at a time. If its too soft I found adding more cream cheese helps.

Wednesday, November 4, 2009

Can Cupcakes be Haunted? Naaa...

Terrific Trio of Terrifying Treats!

Halloween is one of my favorite holidays. I love the spooks, the sweets, and the season all together. This Halloween I made cupcakes for a friend. The order: 30 vanilla cupcake for a parents Halloween party. Kids like candy, kids like cupcakes so I put them together. I also got some great ideas from Martha Stewart's website to suite the parents as well.

I have to be honest, I tried the witch cupcakes. I cut the tops off sugar cones and dipped them in chocolate, made green buttercream frosting and with an assortment of candies for topping I made an assembly line for easy decorating. I actually spent a lot of time on this idea to find out that I made the wrong kind of frosting to hold that weight of decorations. The frosting was too smooth and light to hold up the candies. So if you are going to make witch cupcake next year I recommend using a very thick frosting that doesn't get soft. Be careful, your witch can closely resemble an owl which wouldn't be a bad idea for Thanksgiving.

I went with the Ghooley Ghost, Fun Frankenstein and Black Widows Web. These were all really fun to make. I used a standard Vanilla Cupcake recipe with a buttercream frosting. A few tips: I used electric green food coloring for the frosting so it didn't resemble a Christmas green. I recommend making some of the details with a fine piping bag and black frosting and to experiment with different candies. No matter what the recipe calls for, a little bit of black licorice goes a long way. The critique: The kids voted for the Fun Frankenstein and the candy cups probably because he had the most candy on top. As my favorite animated orange cat would say, "Candy, candy, candy candy!"


Fun Frankenstein:
Electric Green buttercream frosting, sour straws for mouth, caramel candy corns
as bolts, Halloween M&Ms for eyes and black licorice for stitches and nose.


Ghooley Ghost:
Buttercream frosting piped on with an Ateco 809 for height,
black Halloween M&Ms for eyes, black icing applied with small
piping bag for mouth and black licorice for brow.


Black Widows Web:
Electric Green buttercream frosting with black frosting piped on and
pulled with a toothpick and black licorice or red vines for spider legs.


To package them I used black tissue paper and put the cupcakes in a standard cupcake holder. For a friend that's fine, normally I would use my Mixing Bowl stamp and boxes. As a special touch I placed cupcake liners of assorted Halloween candy in between the cupcakes to keep them from bumping into each other. An overall success.


Wednesday, October 7, 2009

Very Merry Unbirthday to Me and You!

Yellow Cake with A Lot of Work Chocolate Frosting

For the past month or so I have been communicating back and forth with my Great Aunt Maureen, the one relative who, god bless her soul, has kept Grams' recipes and accompanied special stories all kept away in a safe place.


My Dad for years would talk about this yellow cake. This cake was for him major food nostalgia
- just how Grams' sugar cookies are to me. Yes, I said a standard yellow cake. This cake fed a many birthday tummy.

I emailed Maureen for the recipe so I could replicate the efforts and see just how whimsical this cake was. This is what she emailed back.

Cream: shortening/butter and sugar
Beat in: eggs

Sift together: sifted cake flour, baking powder and salt

Stir into creamed mixture alternately with: milk and vanilla


Pretty basic right? and you are probably asking what I did...how much, how long and how hot? She emailed me back saying pretty much that before World War II most bakers would fold the egg whites in last which made for a lighter, higher cake. The cook time varied. Most old recipe books didn't list the time or temperature, they new their oven intimately. Gotta love those little nuggets of timeless information!

The cake was delicious! Light, fluffy and moist. Next time, with the additional information given I will use a 8x8 cake pan or use my mini cake pans to make a yellow layer cake with and bake it at 350 for 25-30 minutes.

To accompany this cake recipe was
A Lot of Work Chocolate Frosting that is (suppose to be) just like chocolate fudge. Apparently I didn't work at it enough! I am very impatient when it comes to waiting to eat dessert and so are my friends. The chocolate needs to be made into a ganache and cooled so it's spreadable. I however, was fine with chocolate sauce and it seeped into the top layer of the cake and it was like chocolate heaven! Sorry the pic isn't that great.

Thank you Maureen!