Recipe Search

Showing posts with label Chocolate. Show all posts

Wednesday, June 1, 2011

S'mores are as American as Apple Pie

You know how much I love smore's (see S'more Tarts 2010), so much after having several traditional smore's that summer I thought to make a s'more brownie. Yes, it's been done before but I've never had one and had a huge hankering for brownies. 

Brownies take me back to my childhood home when my sisters and I would run around with nothing to do every summer afternoon. My mom would make brownies - she LOVES brownies and would succumb to the power that chocolate had over her. I tell you, she would cut one for me, one for my sis, one for my big sis and one for herself and we all stood there in the kitchen eating hot ewwey, gooey, fudgey brownies straight from the oven. Ah what a delight! The next day we would see the brownie pan washed and in the drying rack like nothing ever happened. What happened to all the brownies? Brownies didn't last more than a day in our house. Same with apple pie (apple pie post coming soon.)

This recipe showcases the chocolate aspect of the s'more. I read many tips from this recipe and they all said that it was difficult to cut the brownies once the marshmallow had melted, sliding right off like cheese does on pizza. With that said, I cut the brownies into perfect squares then topped each one with a marshmallow before putting the tray back in the oven to roast for a few minutes. Try it, kid tested, Mother approved!

You can find the recipe for S'more Brownies here compliments of Food Network. Happy Baking!


Cooked and Cut Ready for S'more Toasting


Graham Crust, Gooey Brownie topped with Toasted Marshmallow

Monday, November 1, 2010

Know any graveyard cake diggers?


Halloween is my favorite holiday for two reasons, the spooks and the treats. Why else? Now, as an adult as much as I would love to put on a costume and go trick'r treating, bringing home a pillow case full of candy that would be absolutely (totally awesome) against any kind of Halloween rules there are. Kids do have all the fun and it wont be until I have some kiddies of my own that I, or they will be able to go candy crazy!

For Halloween I made a spooky graveyard cake with sugar cookie headstones and iced sugar cookies. The graveyard cake is deliciously moist pumpkin cake with chocolate ganache frosting. Both, are very easy, I promise. I used this Martha Stewart recipe here. I was going to make my favorite sugar cookies anyways so I made the headstones with that recipe rather than the shortbread cookies offered. You can do either one though. The sugar cookies recipe is listed below.


This sugar cookie recipe will serve as your go-to sugar cookie recipe for any holiday cookie shapes you want to use. The recipe is from a friend of mine, she uses a cream cheese frosting that is absolutely delicious, so its best to spread a thin layer on if you want it to dry all of the way. Otherwise you can cover each layer with parchment paper to keep them pretty.  


Seasonal Sugar Cookies
from Kelley M.
time 12-18 min
yield Makes 2 batches for 1 frosting 


Ingredients
Cookies:
1/2 cup Butter
1 cup Sugar
1 Egg
1/2 tsp Vanilla
2 - 2 1/4 cup Flour
2 tsp Baking powder
1/2 tsp Salt


Frosting:
8 oz Cream Cheese, cold
1 stick Butter, room temp
1/8 tsp salt
3 3/4 cup confectioner's sugar
1/2 tsp Vanilla

directions
1. Preheat oven to 350 and line baking sheets with parchment.  
2. Cream butter and sugar.
3. Blend in egg and vanilla.
4. Sift and add flour (add additional 1/4 cup depending on consistency), baking powder and salt.
5. Roll into ball and chill.
6. Roll out to 1/8 inch thick and cut out shapes. Keep cool as you go.
7. Bake for 12-18 min until light golden and cool completely on rack before frosting.
8. To make the icing, mix all ingredients in mixer fitted with paddle attachment and separate into bowls and add coloring. 


Happy Halloweeeeeen! 


Saturday, September 11, 2010

Baking from the Farmers Market: Strawberries


Chocolate and Strawberry Buttercream Cake. Delicious! I love this cake because the light and fruity strawberry puree buttercream frosting compliments the richness of the dark chocolate cake. I have also been moving toward a more rustic approach to decorating that you will see more of. 

Chocolate Cake with Strawberry Puree Buttercream
 Another treat I swoon for is the combo of a biscuits and fruit. To die for! Here I have whipped up Strawberry Shortcake Cookies and man they were perfect! I love strawberry shortcake but what I want to to get all the flavors in one bite. Here is it. Bake this one up before its gets chilly outside. 

Strawberry Shortcake Cookies

 You can get just about anything at your local farmers market these days and I highly stepping out of the chain grocery store and hitting the streets for true, organic, local farming. Both recipes highlight farmers market fresh organic strawberries and organic cage free eggs.

Enjoy the rest of summer! Bake on!

Wednesday, August 11, 2010

Going once, going twice, SOLD!

My company raised funds to donate for the American Heart Association Heart Walk and for the cause I donated two 6 inch cakes to our silent auction. The grand coconut cake sold for $20 and was devoured by my friend and her mother that are both controlled by two things in this word, coconut and their wild sweet tooth's. The dark chocolate raspberry cake sold for $25 and gobbled up by our lucky CEO.

I love baking for a cause and hope I have the option to do more of it in the future.

Dark Chocolate Raspberry Cake


Grand Coconut Cake


Monday, April 19, 2010

Babycakes

My mom always called us girls babycakes. I have two sisters, an older sister and a twin sister. We all just happen to be really creative. One thing I love about my sisters is that we always share. Don't get me wrong, as kids we hated sharing. Today, we can take one look at each other in a restaurant, although thinking we should order something healthy like the a pear and Gorgonzola salad (with the dressing on the side), we're really craving something like a blue cheese burger and fries. It only takes one glance at each other and we know we'll be nibbling off each others plates, our guys wouldn't even know what hit'em, they hate sharing dishes anyways. Same thing with beer and desserts. We just share. I think my mom would be proud. Her babycakes are sharing. 

These babycakes or "cakes for two" as I call them are perfect for sharing or fulfilling the craving of one very big sweet tooth. What can you say, they are just really cute and these flavors are perfect for spring. Here is my collection of "cakes for two." Enjoy!

4 inch two layer Red Velvet Cake with Cream Cheese Frosting

This cake was very rich and dark red. The cake was moist and the frosting was just enough. Perfect or two lovers. 

 4 inch Chocolate layer cake

Double chocolate birthday cake, cant go wrong with that.

4 inch two layer Lemon Cake with Salted Caramel Frosting

Surprisingly the combination of lemon and caramel tasted great together. I had some extra caramel frosting from the beer cupcakes that I stored in the freezer that I just whipped up real quick and it was perfect for a little variety. It looks the silkiest out of all the cake frosting. A little lemon rind garnishes the top of the cake. 

 Four inch Strawberry Puree Buttercream Cake
This cake is made with fresh strawberries pureed into the buttercream with a nice buttermilk vanilla cake. Very fresh and perfect for spring. 

6 inch two layer Lemon Raspberry Cake with Buttercream Frosting

This cake is spring time in a bite and is perfect for four. Mixed berry preserves fills the inside layer of the cake. One trick is to line the outer circumference of the first layer with buttercream then spread the filling, in this case the preserves, in the center. The result is a nice white cake without berries seeping out the sides.   

 Rustic Chocolate cake 

This cake is rich on its own. I baked these cakes in four inch Spanish tera cotta ramekins. Chocolate ganache spread between the layers and ontop. Perfect with a fine espresso.

Red Velvet No-cup Cakes

I like making cupcakes without the liners and that's what I mean by no-cup cakes. I think it makes it easier to eat and makes it a bit fancy.

Bake on, 
Sarah

Tuesday, March 9, 2010

A Flight of Dark Chocolate Beer Cupcakes


We all like a little variety and when it comes to food and beverage I like small plates. I like to taste many things and compare and contrast. My beer cupcakes last weekend were inspired by two things.
First, the Winter Brew Festival at Linden Street Brewery in late January. The festival was great. They showcased many beers, all of my local favorites and a lot of medal winners. We started at the dark beer section and made our way to the home brews. 

Second, the concept of ordering a "flight" or sampler when going out. You can usually find me ordering from the starter menu and trying a few different wines. I am totally fine having those two concepts marry which is the subject/experiment for this update - A Flight of Dark Chocolate Beer Cupcakes!

Beer #1: Alaska Brewing Company, 2009 Smoked Porter
Beer #2: Anchor Steam Brewery, Porter
Beer #3: Lagunitas, Cappuccino Stout
Beer #4: New Belgium, 1554 Black Ale
Beer #5: Marin Brewing Company, Blueberry Ale

I tried two differed recipes with four different beers and here were my results. 

My favorites were Lagunitas Cap Stout (very pleasing dark flavor with hints of espresso) and New Belgium black Ale (mild, darker beer with sweet notes) mostly because of the recipe used. The recipe called for chocolate that was melted and worked into the wet ingredients. I also folded the egg whites into the ingredients at the end before piping into the cake pan. The cake was moist and had hints of espresso. It went very well with the chocolate ganache frosting glazed on top.


Lagunitas Chocolate Cupcake with Salted Caramel Buttercream Frosting


New Belgium 1554 Black Ale small cakes with Chocolate Ganache Frosting
The Anchor Steam (deep, creamy and smooth with slight coffee flavor) and Alaska Porter (strong smoked flavor, full and dark, very mild after taste) cakes had great flavor but the recipe made a crumbly cake. It also called for cocoa powder instead of melted chocolate which I do not prefer. The beer was delicious and went really well with the salted caramel buttercream frosting piped on top.

 Anchor Steam Porter Chocolate Cupcake with Salted Caramel Buttercream Frosting


Alaska 2009 Smoked Porter Jumbo Cupcake with Chocolate Ganache Frosting
And last but not least...Marin Blueberry Ale (lighter ale with a strong blueberry essence). This would make a great vanilla beer cupcake. Unfortunately, the beer was too light for the chocolaty goodness I was going for

Overall, once you find a dark, robust beer, whether it be smoked or espresso flavored, I don't think you can go wrong. Next would be finding the perfect cake recipe to compliment the beer :) and I think I found mine. Tips: Try melted chocolate instead cocoa powder and folding in the egg whites at the end as it does help make for a fluffy cake. 


Flight of Dark Chocolate Beer Cupcakes ready for delivery!
 
Bake on,
Sarah

Wednesday, December 30, 2009

Christmastime is here again!

Every year I plan to make a lot of my holiday gifts from scratch or by hand. Gifts tend to be more from the heart and sentimental when you make them yourself. This year I planned and actually accomplished making cookie boxes for close friends and family and small truffle boxes filled with goodies as stocking stuffers.

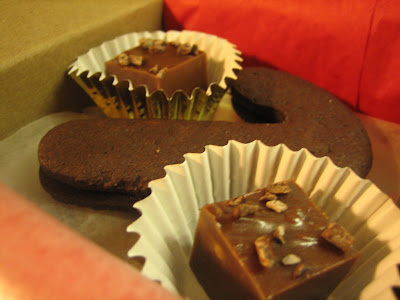
The cookie boxes included recipes from my favorite chefs. Chewy Ginger Cookies, Grandma Doyle's Sugar Cookies, my favorite Coconut Macaroons, Chocolate Holiday Cookies and Chocolate Caramels. My favorite part of all this is the presentation, assembling the boxes, wrapping the caramels in festive wrappers and putting the cookies in cupcake liners. It really ties a cookie box together.

Carmels and Macaroon Truffle Boxes


I know at times it may seem overwhelming, trust me, at one point I couldn't stop working. I had glitter all over the floor, double stick tape stick to me while pulling cookie batch after cookie batch out of the oven. My suggestion to you in times when it just doesn't seem possible to make a lovely gift when its a whole lot easier to go buy something...assembly line baby! Making something is way better for your soul, your receivers heart, and all around better for mother nature. Here's how:
  1. Choose a box that fits well with what you want to put in it and how you want to ship/give it.
  2. Pick out festive papers and stickers for labels with a special touch
  3. Embossing makes your crafts pop of the paper. You can find the powder and heat gun at your local craft shop
  4. Pick a paper to line the inside of the box. This can be a tissue paper or parchment. I use wax paper because my Grandma wrapped everything in wax paper
  5. Organize an afternoon of baking. I split the days in half, make all of the dough on day one and bake all the cookies on day two.
  6. Assembly line! Build all your boxes, make and apply your labels, line all your boxes and fill them up.
Here are some photos of what I did this Christmas.

Layer 1


Layer 2


Layer 3


Final Cookie Box

I hope your holidays are full of warm cookies, sweet cakes and family and friends. Happy Holidays from the Mixing Bowl!

Wednesday, November 25, 2009

Thanksgiving: Part 1 - Cupcakes

Christmas is here again! Christmas in San Francisco is like no other. It’s a bit early for full on Christmas spirit throughout the city but at Union Square Park the Holiday spirit is coming together; kids crowd around the holiday ice rink, all the store windows are decorated with snow-scapes and Santa villages. Visitors from all over stroll the streets bundled up with a cup of coffee sharing the sidewalks with the early bird shoppers. My favorite holiday tradition of all? The puppies and kittens in the window at Macy's (old Gumps tradition) that’s put on by the SPCA! So so adorable!

My other favorite holiday tradition...baking of course! The only reason why I can relax and enjoy the holidays even when it gets crazy. This year because I am making so many treats I have made a schedule for myself and when you have five or six desserts you are making in one week that’s the only way to go. But really I couldn't do it without my stand mixer! If you do a lot of baking, even if its just for the holiday, invest in one, they will last you a lifetime and save you the sweat and tears of mixing by hand. I will keep you in the loop on the holiday makings - this is Part I starting with Thanksgiving!

The first recipe of the holidays I will share with you comes from my co-worker Elizabeth. This recipe, Chocolate Chip Kahlua Cupcakes with Orange Cream Cheese Frosting is a real crowd pleaser and is semi-homemade. Us young girls are pretty busy these days managing our social and professional lives that some times its difficult to make everything from scratch. As you know I am a firm believer in making it from scratch but this recipe I'd say will knock their socks off even if you are short on time.

This recipe was originally made for a bunt cake pan. It translates well into 2 dozen regular cupcakes and 2 dozen minis and the frosting recipe is provided as well but is totally interchangeable. I chose a pumpkin frosting for Thanksgiving but oddly enough the frosting came out tasting more orange than expected changed the name too. But what a great pair the orange frosting made with the chocolate cupcakes. Who doesn't love those chocolate oranges at Christmas? Happy Thanksgiving and enjoy! Stay tuned for Part II.

Kahlua Chocolate Chip Cupcakes with Orange Cream Cheese Frosting


Minis

Kahlua Cake
Recipe provided by Elizabeth Young

1 pkg. Devil’s food cake mix
1 Large pkg. instant chocolate pudding mix
3 Eggs
1 c. Sour cream
1 c. Kahlua
¾ c. Vegetable oil
12 oz. Chocolate chips (I use Ghirardelli 60% baking chips)

Preheat oven to 350 degrees. Combine everything but the chocolate chips and mix well. Mix the chocolate chips into the batter. P our into a lightly greased pan or muffin tins with cupcake liners. Bake at 350 degrees for 60 minutes (17-20 minutes for regular cupcakes and 10-12 minutes for mini cupcakes). Let cool before removing from pan. Top cooled cake with Pumpkin Cream Cheese Frosting.


Pumpkin Cream Cheese Frosting (that tastes more like orange than pumpkin)
Recipe provided by Country Living at www.countryliving.com

1 package(s) (8-ounce) cream cheese, softened
1/4 cup(s) pumpkin purée
1/4 cup(s) (1/2 stick) unsalted butter, softened
1 tablespoon(s) fresh orange juice
1 teaspoon(s) grated orange zest
1/2 teaspoon(s) pure vanilla extract
4 cup(s) confectioners' sugar, sifted

Blend the cream cheese, pumpkin purée, butter, orange juice, zest, and vanilla in a large bowl using an electric mixer set at medium speed until smooth. Add the sugar and continue to beat until light and creamy -- about 5 more minutes. To keep your frosting super thick first drain most of the liquid from the pumpkin then add the pumpkin a little at a time. If its too soft I found adding more cream cheese helps.

Wednesday, August 19, 2009

The Doyle's Dont Just Like Beer...


We love chocolate too! Last weekend I made a Porter Chocolate Layer Cake with Chocolate ganache and Buttercream Frosting...yes I said Porter, for Colin's 32nd birthday. The cakes I make are individual size, either for two or one serving each for 4. Perfect really if you don't want an entire cake hanging around the house. With the left over batter I can usually squeeze in a dozen or dozen and a half of cupcakes.

This was the first beer dessert I've made and I was so pleased it came out so well. I think Grandma Doyle would have been pleased as well. The house smelt like if you can envision walking into a pub right off the chocolate river in Willy Wonka's Chocolate Factory. YUMMY! You wouldn't think beer and chocolate but it actually makes for a light and moist cake.
I got the recipe off of smittenkitchen but I made a few changes to what I had in the kitchen. This would be my adaptation. Go ahead and bake on! and let me know what you think!


Porter Chocolate Layer Cake with Chocolate ganache and Butter Cream Frosting

For the Porter Chocolate Cupcakes
1 cup porter, I used Black Butte Porter
1 cup (2 sticks) unsalted butter
3/4 cup unsweetened cocoa powder (preferably Dutch-process)
2 cups all purpose flour
2 cups sugar
1 1/2 teaspoons baking soda
3/4 teaspoon salt
2 large eggs
2/3 cup sour cream

Ganache Filling
4 ounces bittersweet chocolate
2/3 cup heavy cream
2 tablespoons butter, room temperature
1 to 2 teaspoons vanilla extract

Buttercream Frosting
3 cups confections sugar
1 stick unsalted butter, at room temperature
3 tablespoons heavy cream

1 teaspoon vanilla extract

Make the cupcakes: Preheat oven to 350°F. Line 24 cupcake cups with liners. Bring 1 cup porter and 1 cup butter to simmer in heavy large saucepan over medium heat. Add cocoa powder and whisk until mixture is smooth. Cool slightly.

Whisk flour, sugar, baking soda, and 3/4 teaspoon salt in large bowl to blend. Using electric mixer, beat eggs and sour cream in another large bowl to blend. Add porter-chocolate mixture to egg mixture and beat just to combine. Add flour mixture and beat briefly on slow speed. Using rubber spatula, fold batter until completely combined. Divide batter among cupcake liners, filling them 2/3 to 3/4 of the way. Bake cake until tester inserted into center comes out clean, rotating them once front to back if your oven bakes unevenly, about 14-17 minutes. You can also divide the batter between cake pans as I did and continue to check the cakes for done'ness after 10 min. Cool cupcakes on a rack completely.
Make the filling: Chop the chocolate and transfer it to a heatproof bowl. Heat the cream until simmering and pour it over the chocolate. Let it sit for one minute and then stir until smooth. (If this has not sufficiently melted the chocolate, you can return it to a double-boiler to gently melt what remains. 20 seconds in the microwave, watching carefully, will also work.) Add the butter and stir until combined.
Fill the cupcakes: Let the ganache cool until thick but still soft enough to be piped (the fridge will speed this along but you must stir it every 10 minutes). Meanwhile, using your 1-inch round cookie cutter or an apple corer or talent with a paring knife, cut the centers out of the cooled cupcakes. Make sure not to cut all the way through the cupcake liner. Put the ganache into a piping bag (or ziplock with the corner cut off) with a wide tip and fill the holes in each cupcake to the top.

Make the frosting: Whip the butter in the bowl of an electric mixer, or with a hand mixer, for several minutes. You want to get it very light and fluffy. Slowly add the powdered sugar, a few tablespoons at a time. When the frosting is thick to spread drizzle in the cream. To ice and decorate the cupcakes I used an Ateco 809 tip to make the poof of buttercream and topped with chocolate covered blueberries.